Tray Tinkering
Manufacturing after the turn of the century saw remarkable advances in metallurgy
and metalworking procedures. Deep drawing of sheet metal parts began to be a science
instead of an art - the famous command sets used covers that were drawn out of single
pieces of thin aluminum. The "cafeteria trays" that formed the bottoms of many
shock mounts were similarly made of single pieces pressed into a shallow mold. The BC-375
shock mount reflects this kind of construction. The difficulty comes when trying
to replicate an otherwise unavailable shock for a rare piece of equipment. This
particular effort involved the FT-157 shock mount for a BC-307 transmitter, made by General
Electric in the mid-30s, shown below:
The fabrication drawing below is one I made up from the mounting drawing in an original manual,
scaling unknown dimensions from those shown. This method of replicating
the mounts is often the only way to do it, the actual mounts (and drawings for them) having been deep-sixed ages ago.
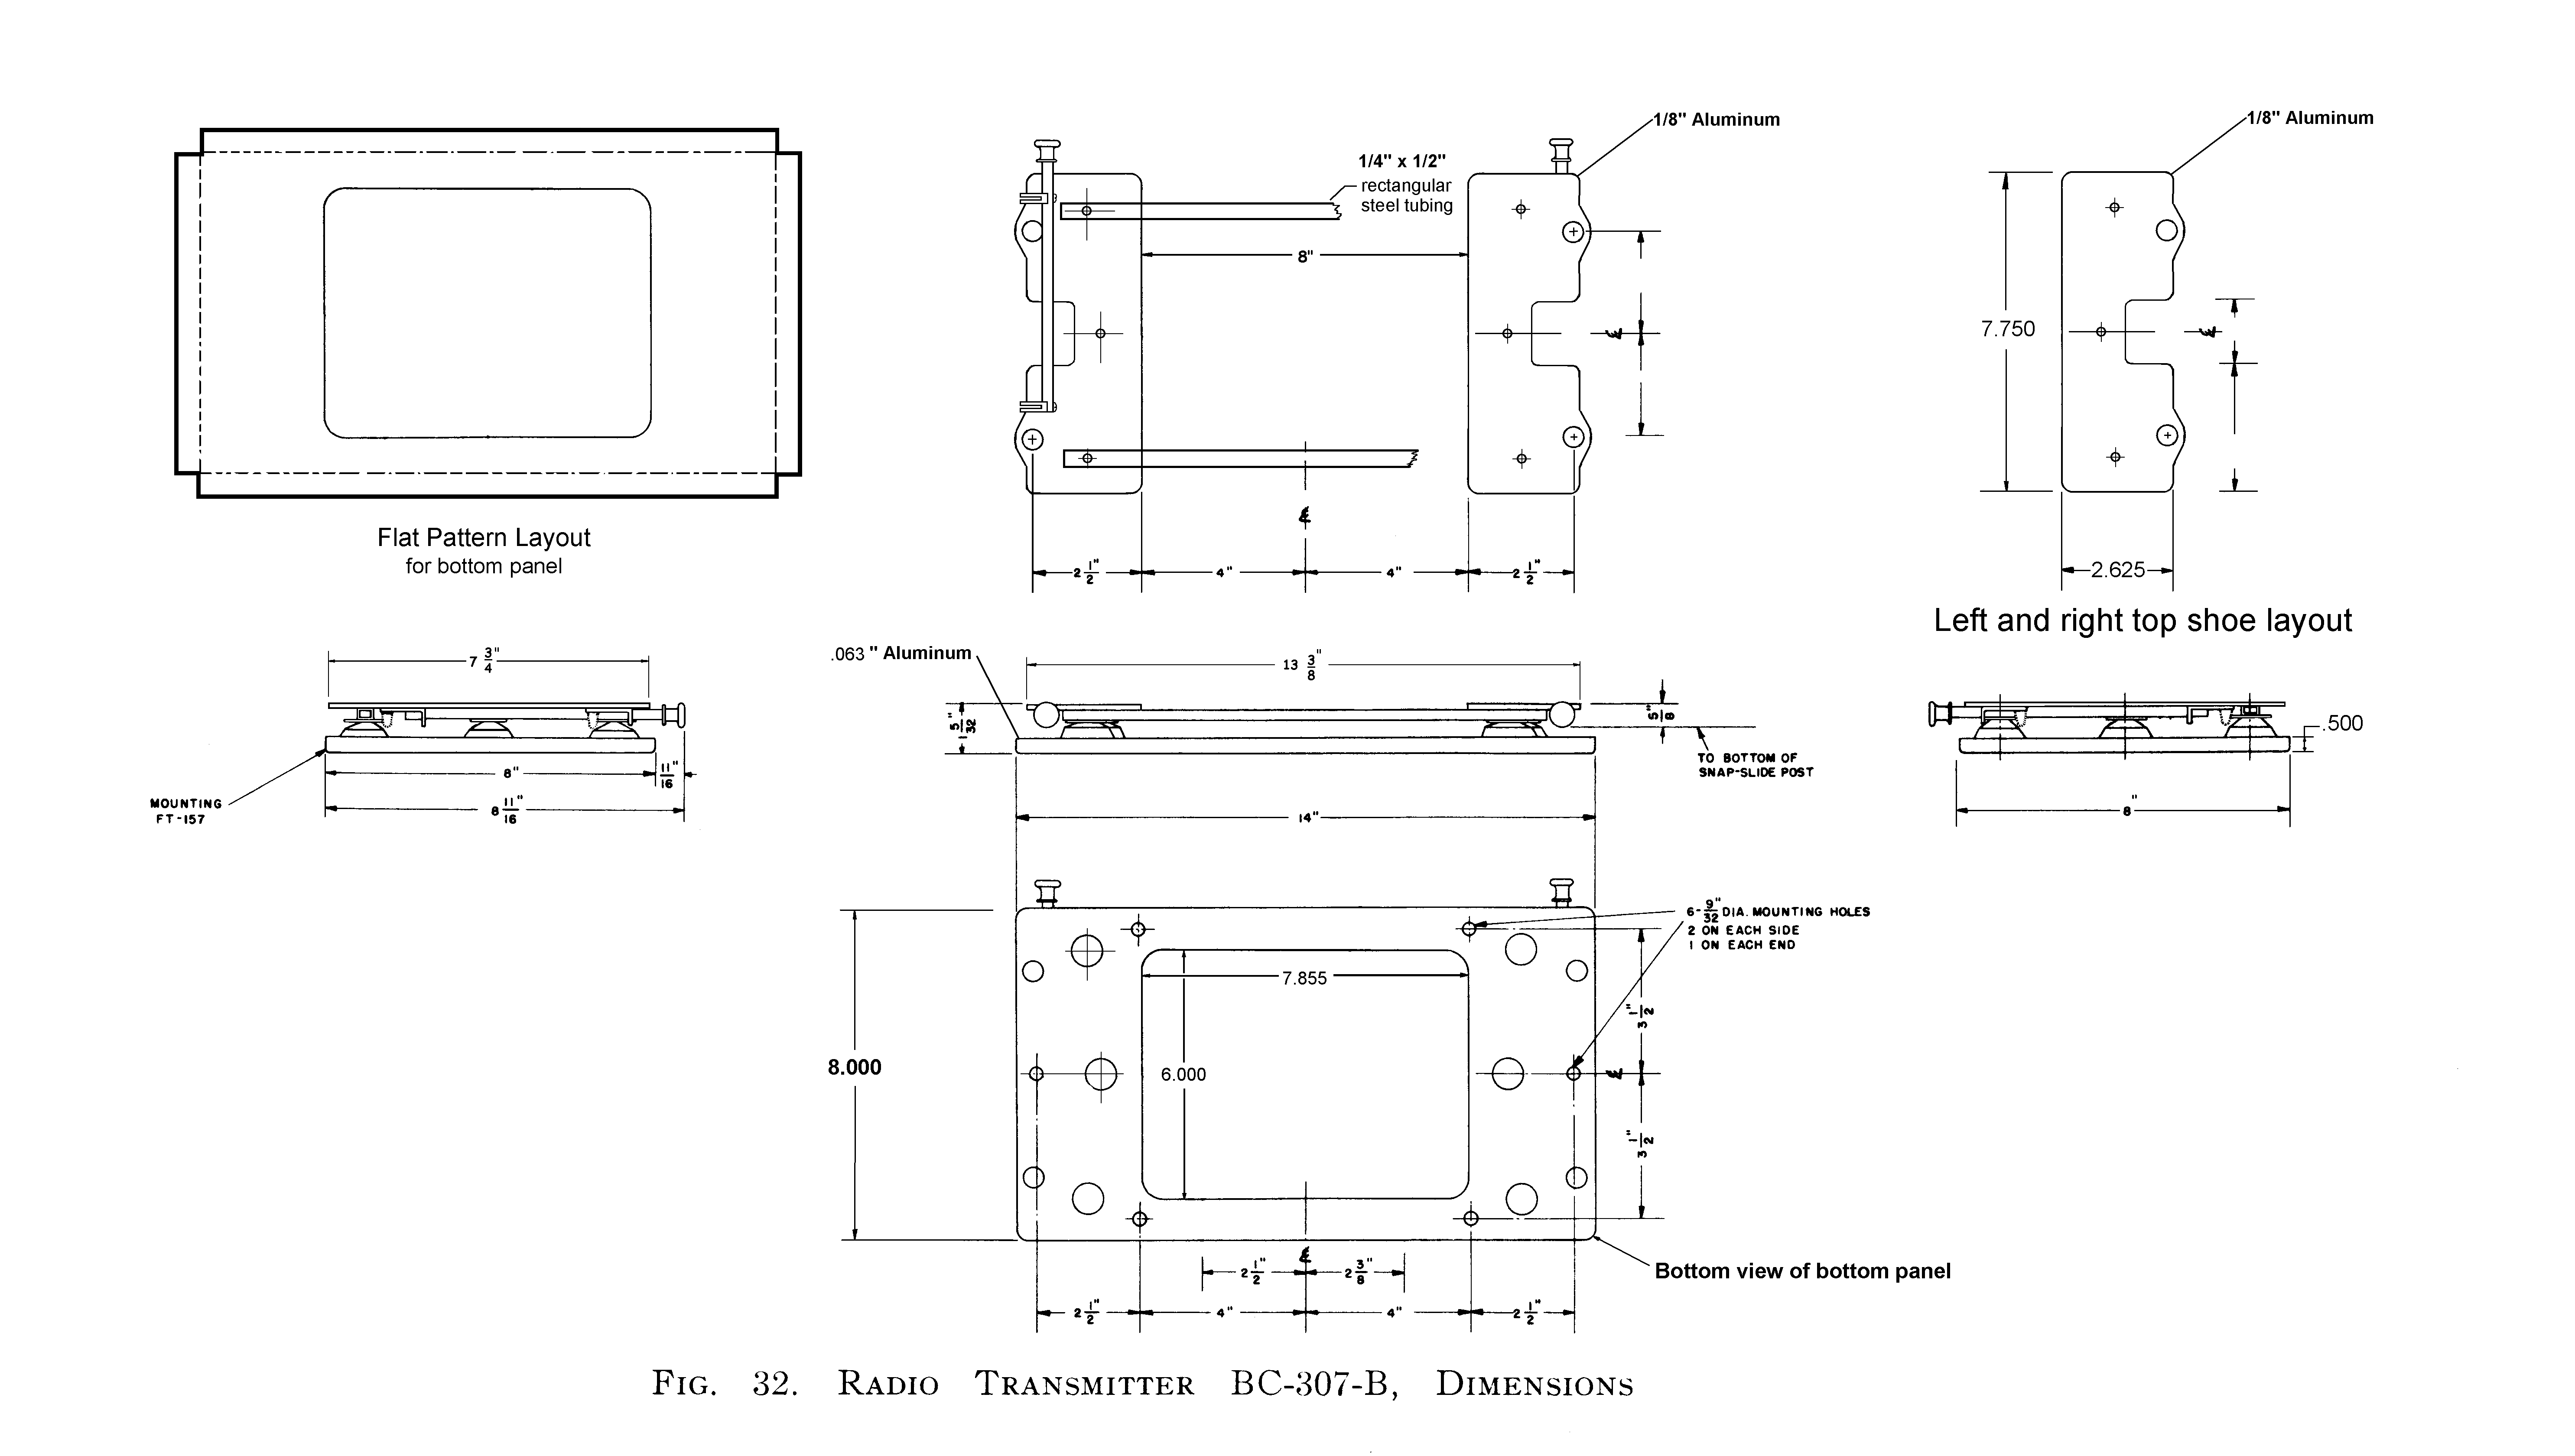
Now, it is certainly possible to mill out male and female dies from tool steel and
press the tray into final shape in the same way it was originally made. A quick
check of the pressures required showed using that approach would far exceed the meager capacity of
the 12 ton hydraulic press in the shop, though. A search of the web indicated
there was a more labor intensive method that was suitable to making single items.
Blacksmiths have long used a technique called raising and planishing, which involves making
up a male die, often out of hardwood, and simply hammering the sheet metal over
the form until it conforms to the final contour. This is the method that was used
for the BC-307 shock mount shown here. The technique is ancient, and was used to
make medieval armor, among other things. Present day medieval armor fabricators
understand this process well, and it begins with a procedure called "raising", which does
the bulk of the bending to the final shape. I cheat a bit by using the
Di-Acro brake
shown above to make the initial outside lip bends. The aluminum used needs to be one of the easily
formed alloys like 5052, and then has to be firmly clamped to the die to maintain the correct final dimensions.
Initial tapping with a raising hammer results in a really ugly duckling, with
bumps and folds all over the place. However, patience
and perserverance with the second phase, called planishing, is eventually rewarded with an almost sudden change in appearance.
Aluminum is especially responsive to stretching forces, and gentle, steady tapping on a
corner will finally end with a perfectly formed female lip, marred only by hundreds
of tiny flat spots. Patient wet sanding with wet or dry sandpaper will gradually
eliminate the roughness.
To be continued sometime in this century
Return to AAFRadio